Pages

Tuesday, July 22, 2014

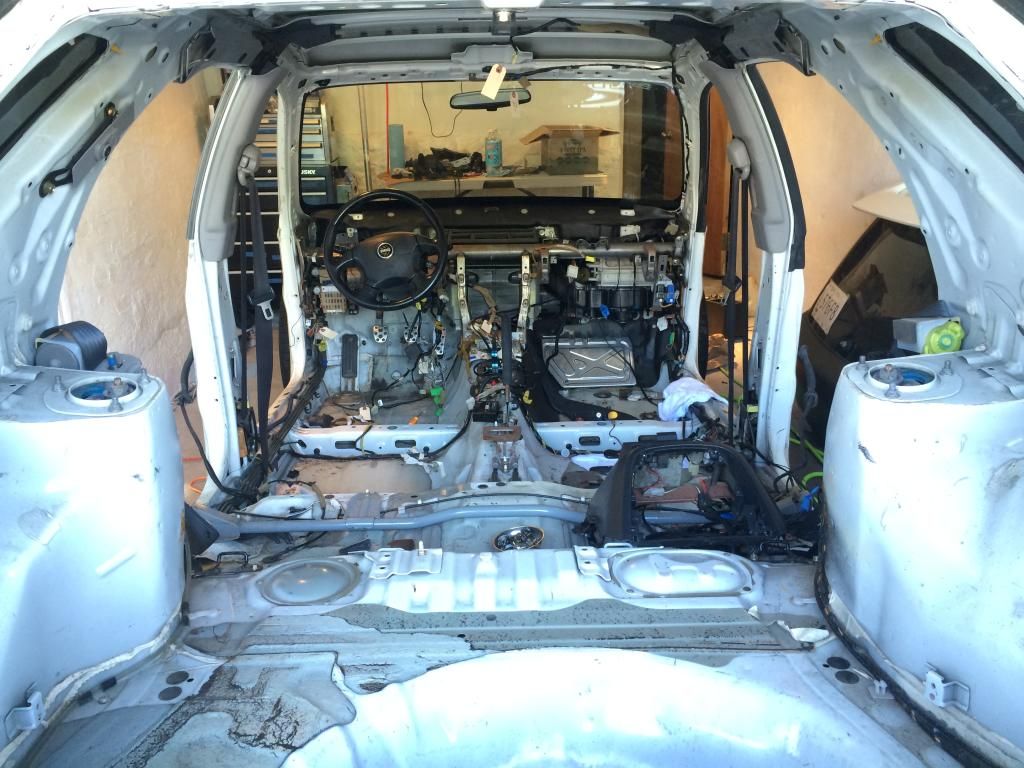
The shell is gone!

Sorry for the lack of updates lately, we've been spending a bit of the weekend time at my family's place by the water and enjoying the summer.


We've finally sent the shell on its way to a new home. We tried to sell it for $100, then in exchange for a little beer, but FREE finally got it moving. It'll just be used for a rocker panel, but it saved us from having to chop it to bits, then rent a truck to haul it off to the scrapyard, just to break even on scrap/cost.


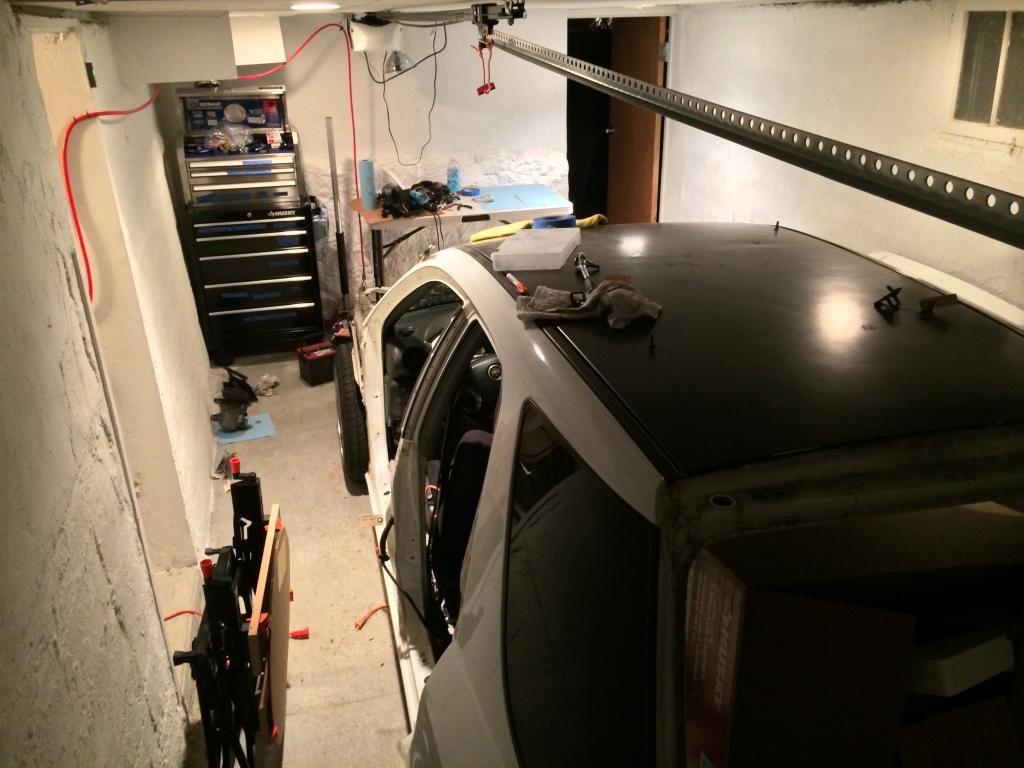
Since the car left, we cleaned up the garage, got tools de-grimed a little, and changed the setup to make room for part refurbishing. Here's the new view!


High on the list are suspension parts and trimming down the wiring harness. We're probably going to replace the rear lower control arms/lateral links. One bushing is shot, and the arm got a bit heat-treated in the process of freeing that long bolt. It'll also allow us some additional alignment adjustments. We're also trying to decide what other components we want to upgrade/replace. A limited slip diff is high on the list.

Monday, June 30, 2014

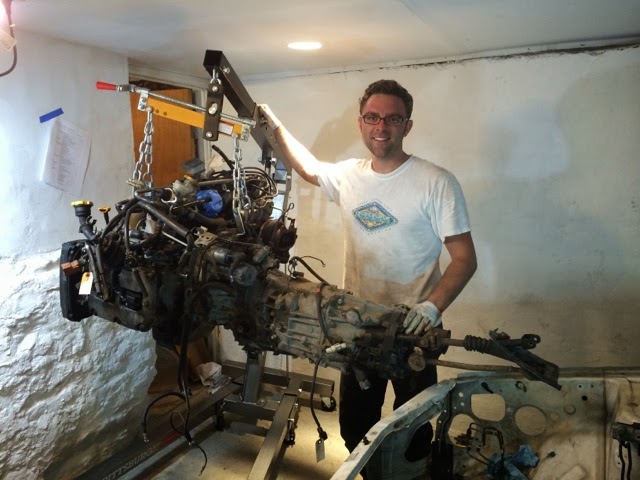
Getting back at it after the Miata diversion: Engine is OUT!

This weekend we had some time for working on the WRX again, no Auto-x, the Miata is healthy, and not too many house chores to tend to.

Saturday was spent on the gas tank (easy), driveshaft (easy), and front suspension (major pain).

In theory, each suspension arm comes off with only three bolts. Sweet, should be quick. Nope. Remember that long bolt in the rear? It's shorter on the front, but just as bad. There's one with a bolt through two frame locations, bushing with a metal sleeve in the middle between. We had to cut that off from both sides. Took a while, given the awkward location, hard steel, and my slightly underpowered compressor.


Got that off, and went to remove the rear brackets. On the drivers side, one came off easily, the other spun in place. The bolt went into a nut that was "permanently" welded onto the frame. I wish. The next hour was spent creating an access hole through the wheelwell to get to the back side of that weldnut, which was not-so-welded, and trying to get a solid enough grip on it with visegrip pliers that we could rattle away on it with the impact gun.


Frustrating day, but we got the front suspension and axles out of the way, along with the front subframe.


Sunday: Got up, had breakfast, and headed to my family's house to fetch the Sunfish (small sailboat) to bring to the summer place. We visited with family for a bit, made the drive, and were back home to start on the car around 5:30.

We began with freeing up the wiring harness, first from inside, then severing connections in the engine bay. We fished those through to the cabin, and pulled it out. Yikes. It was an entire armfull. The wiring "diet" may be interesting.
Previously removed section on right, main harness on left. 

From there, we removed the pedals, chased out the throttle cable, brake booster, drained the clutch master, etc.
We sat back for a minute, and realized we were actually ready to pull the engine. We spent a little time getting the area ready- We'd had a table sitting up in front of the car, cleared it off & moved it out of the way. We looked around the engine for suitable hookup points: A nice bracket by the AC, the location for the rear pitch stop mount, and a bracket next to that.
We decided to pull the tramsmission with the engine, keep things simple that way. After we found bolts and hooked everything up, it was time to start removing the crossmembers from the bottom. We removed the nuts for the engine mounts, then the transmission mounts, then dropped the front crossmember off, and the engine was floating freely. Looks like we got the load leveling about right!


With the engine floating, it was just a matter of sliding it little by little, tipping as necessary (a lot!) and moving it forward.  Halfway through, we decided the car needed to move down, as we were running out of overhead space- The ceiling in the garage is only a few inches over 6 feet. We jacked up the frame, lowered the jackstands, and set it back down. Once at the new height, it wasn't bad to get the engine out. That transmission is long though, when it's in the way of lifting the assembly out of the car!


After the engine was free, we were left to figure out what to do with it! It clearly wasn't going to fit into the basement with the rest of the parts.
We settled on resting it on the front crossmemeber, so that the mounts were supporting the weight of the engine, not the oilpan. In turn, the crossmember rested on the legs of our engine hoist. More than good enough to leave overnight, or even for a few days.

It's free!


As an amusing side note, I can now pick up the front or back half of the car, pivoting on the 2/3 point at the other end of the jack stands. Good news, since we're going to have to get rid of this shell somehow! We will probably offer it up for someone to use as a rally base, but otherwise it's scrap metal.

We're happy, tired, and going to enjoy a little homebrew beer before some well deserved sleep!


Sunday, June 15, 2014

Weekend wrapup: Miata work and engine prep

The Miata that we've been driving for Auto-X this year has had a progressively deteriorating clutch. We decided after a few too many slow launches at the starting cones that it was time to solve that problem.

We put the car up on jackstands during the week, and started pulling exhaust, wiring, etc out of the way of the transmission. Also pulled the driveshaft. We decided to fix the rattle in the exhaust "while we were at it".

..Cue a half hour of exhaust maze work, trying to untangle it from the rear subframe brace, bumper, etc. The cat-back is a pretty big piece on an NA miata. We finally got it out, cut off the heat shield, only to find it still rattled. Sigh.

Further investigation proved that it was the resonator that was being noisy- ironic. Tamra called around for quotes on replacing it with a bit of tubing. Seems exhaust shops in the northeast are proud of their work. So, I cut into it in a big T shape, all around one end, peeled back a section across the side, slid the solid liner out, and cleaned out most of the sound absorbing insulation. Next up, 30-45 minutes of quality time with my work's TIG. Came out decently, but the contamination from the inside of the exhaust system definitely wasn't doing me any favors. It's a little ugly, but I'm pretty sure there aren't any pinholes.


Saturday, we pulled the transmission. One short sentence. Definitely easier said than done- I'm still sore from bench pressing ~75 lbs while trying to shift it gently away from the engine. The main drive spline is pretty sticky when trying to disengage it. All bolts were easy to get to with a few feet worth of impact extensions, an impact universal, and deep sockets. It'll go back on this week, as we got the unpleasant surprise of a flywheel with some small cracks from heat spots. We're glad for the Mazdaspeed Motorsports discount.

Old on left, new on right. Yeah, it was about time.


Back in Subaru world, a new toy arrived this week. (support legs fold up for storage)

We also pulled heater hoses and the TMIC to improve access for pulling the engine.

Our security torx keys arrived too, so we were able to pull the airbag control unit, then the main dash bar. The center AC/heater unit is still stuck in place from the small heat exchanger and tubes running to it, and as a result, I think it's pinning a bit of the harness in place.

As an aside, the air lines had been spraying a disconcerting amount of water from the high ambient humidity, so I set up this catch reservoir about 25' down the line, before it splits for the two lines that I run for each side of the car. Seems to work pretty well, despite the fact that the line leading to it is hose, not copper tube as advised. It has caught a few ounces worth of water already, definitely glad not to have that passing through my tools.


Sunday, June 8, 2014

Front sub harness removal and clearing out!

We didn't wind up getting very much taken care of yesterday, spent time with family & cleaning up the house.

This morning we got our shopping out of the way, then set in on the car. Tamra pulled the seatbelts and rear seat brackets, photographing everything for sale. I started trying to free up some of the wiring, twisting tags onto every connector I undid.

We took a short diversion to get the steering wheel and shaft out of the way. It was a bit stuck at the spline for the steering rack universal, but it came free after I figured out a way to brace a screwdriver to pry it out. Tamra was pulling backwards on it too, and was a bit surprised when it landed in her lap!


That accomplished, we were back to the wiring. Remove, tag, remove, tag, repeat. 
It's neat to see all the ways in which they design the harness, and the little hidden pieces you'd never know about at a glance- there are two sensors for the airbags, behind the front bumper support, for instance. The airbag connectors are all also pretty interesting pieces. They require two movements unlike a normal pinch and remove connector, for improved safety.


The main portion of the harness is still trapped, held in place by the dash bar, which requires Torx security bits to remove, so we'll have to pick up some of those soon. 
The aftermath

The harness is surprisingly large when you start to stretch it out, removing it from the car.
This section is just what goes from the front door hinge area, out along the fenders, across the front bumper, and back to the other front door hinge. There's quite a lot to it.


Other jobs today: loosened all lines going to the ABS control unit, some were a little seized. 
Yesterday, pulled the OEM header/cross pipe. Looks like it'll clean up pretty well. 


Good news for our budget & space management issue- Things are starting to sell!
Late last week the front end body panels went, followed by the rear bumper and STi fog light covers today, and it looks like we'll be shipping out the Teins, saabaru roof rail deletes, and maybe a set of headlights tomorrow!

I was proud of this packaging job. Hope it holds up, the package is 64 lbs!

Friday, June 6, 2014

We got it! A friday evening of bolt-breaking

I'm just going to come out and say it. We got that damn bolt free!

Ok, now the backstory.

We ordered a new impact gun to step up our game, an Aircat 1150. It felt noticably stronger than my Craftsman, which was by no means bottom of the line. This one is spec'd at around 1200 ft-lb of loosening torque.


Sadly, that wasn't enough to break it free.

We rattled away on it for a while, heating up the impact socket. That was a new one for me. 
Next air tool to line. We spent some more time with the air hammer/chisel. Nope. More torch. More PB blaster. Nope.

Grabbed the cutoff tool, and cut through the far end of the bolt, next to the hub. Took some time, thick bolt & even my pretty significant compressor was having trouble keeping up.

Eventually got through it, air chiseled the chunk off of the hub, gave it a few heavy whacks with a hammer, then more with the impact gun, and it broke free!
The bolt had mushroomed at the far end from the hammer, so I spent a little while longer with the cutoff tool cleaning up the bolt to round, then we were able to extract it!

Yeah, you could say I was happy.
Pile of tools involved in getting it free!
We finally had all the necessary parts off and out of the rear end. Plenty of cleanup left, but it felt like great progress!


In other news, I took a few minutes at work to print out a keychain for the future car.
Came out pretty well, I think. If I can get my own printer up and running, I'll offer these to other builders. Could make them for whatever text was desired too. 

Tuesday, June 3, 2014

That pesky bolt..

Well, a couple days later, and still no luck on the passenger side long bolt through the two lower control arms and knuckle. We have soaked it in PB blaster, we've run all around it with an air hammer, we've spent plenty of time on it with the impact gun, and we've tried the breaker bar on it. No luck. The front control arm won't even turn on it, though the nut removed easily.


Makes a good case for anti-seize on all similar parts when re-assembling.

We picked up a torch, so we'll disassemble as much as we can in-place before heating things up. You know, avoid flaming brake fluid mixed with dripping grease and the like. Fingers crossed this will get it out.

Sunday was Auto-x, Tamra beat me again! We were both driving well, and I was happy with my performance on the relatively technical course. There was a very sharp decreasing radius that gave me some real trouble, but the rhythm slalom section went pretty well for most of the runs, which was a new one for me!

Photo Credit: Phil Mackaronis

Saturday, May 31, 2014

A full Saturday: Rear end removal

We had great weather today, and put in around 7 hours on the WRX teardown. Breakfast was an omelette with faux-sausage, lots of sharp cheddar, and lattes.


Started out with some cleanup following mid-week brake work on the Miata between auto-x events (one pesky brake keeps hanging up). Once that was out of the way, Tamra caught up on photos of parts for sale, I texted with a few potential parts buyers, then started freeing and labeling the harness, starting at the rear of the car.

One potential buyer came by, looked at parts, ran off to the bank to pick up cash, and was never seen again. The joys of craigslist. The other two were no-shows, but claim they intend to come later. We'll see. We just want the space in the basement for all of the "keep" parts!

I then wrestled with the AC blower & ducting assembly in the passenger footwell. It was a bit difficult to get out around the dash bar, but it came out. Nice little squirrel cage fan design, too! Next was the coolant, made a bit of a mess despite the nicely designed drain fitting on the radiator. It is designed to pour out a little spout when you unscrew the valve, but actually it leaks all around the valve, then runs down the subframe. Oh well, it's empty-ish.

Tamra had been keen to get the rear differential, driveshaft section, axles, hubs, etc out. We tried to separate the flex brake line from the hard line as instructed by Factory Five, but the fitting was pretty stuck. We just removed it at the calipers, not sure if we'll wind up doing braided stainless lines anyway. I pumped the pedal while Tamra caught the fluid in a jar. Next was the ABS sensor line, then the E-brake cables. Got all of those hanging freely, then had a look at what to remove to get the assembly to drop out. Not sure if we took the most direct path, but it allowed us to drop the thing pretty completely, with a minimum of fasteners that we couldn't use the impact gun on.

Things were going unexpectedly smoothly, zip zip zip, set the floor jack to support the assembly, undo the last couple, and it settled down and came right out of the car. Awesome!

We dragged it out the back of the car for a photo op.

She looks proud!

Then, it was time for further disassembly. The bolts holding the bracing on came off without too much trouble. They took some effort, but a ~600 ft-lb impact gun does help with that.


THIS ONE, however. Ugh. One long bolt that holds the two lower control arms in place, mated to the hub. It's exposed on the inner face, which gets blasted with all sorts of road grime, and also collects water. It was pretty well seized on, on the drivers side. We got it off with the help of PB blaster, impact gun, dead blow hammer, and air hammer.

It's out!

The passenger side, on the other hand.. It's still in. It's soaked in penetrating oil, and it is persistent. It's not budging. We'll try again tomorrow after auto-x.

Thursday, May 29, 2014

No longer a roller

..Well, that was easy!

After selling off a set of tires from Tamra's daily, we met up with a local bugeye owner, chatted for a while & sold him a few parts. We had someone anxious to get ahold of the Tein Coilovers that were on the car, so we got it up onto jackstands about as a massive thunderstorm rolled through. Luckily, the wind was going away from the garage opening.


We pulled off the wheels, WOW they were on tight. Took my impact gun some time to get them free. We'll be inspecting those studs before the 818 goes together, but initial impressions were no obvious damage.
The screwed on clips for the brake & ABS lines came off easily- first good sign! Then we removed the top nuts for the camber plates, also easy, and the strut began to drop down away from the frame. Looks like we got lucky, and the suspension's static droop is more than the length of these coils!

The spindle/hub connections to the coilovers came off quickly with the impact gun too, and then it was free! Repeat 3x. The whole job might have taken a half hour. I was shocked, and very happy about that!

Suspension at full droop- no tension on the brake cables,
but we won't leave it this way for too long.


We wiped them down to see what we would be trying to sell, and got a nice surprise, they're Tein Super Street as opposed to the expected Street Basis. The labels are faded, but they have the damping adjustment knob on the top. They also seem to have Cusco rear camber plates & Tein front camber plates. 


Sunday, May 25, 2014

Interior removal

Today we had a slightly lazy morning, but were out in the garage well before noon.

We started with getting pictures of some of the piled up parts, then got on with removing the head unit, AC controls (annoying, with lots of mechanical cables this year), then moved on to the seats, passenger airbag, dashboard, carpet, and some of the other plastic panels. Made sure to spend lots of time tagging each connection I undid. I think that box of 1000 twist tie tags may come in handy.


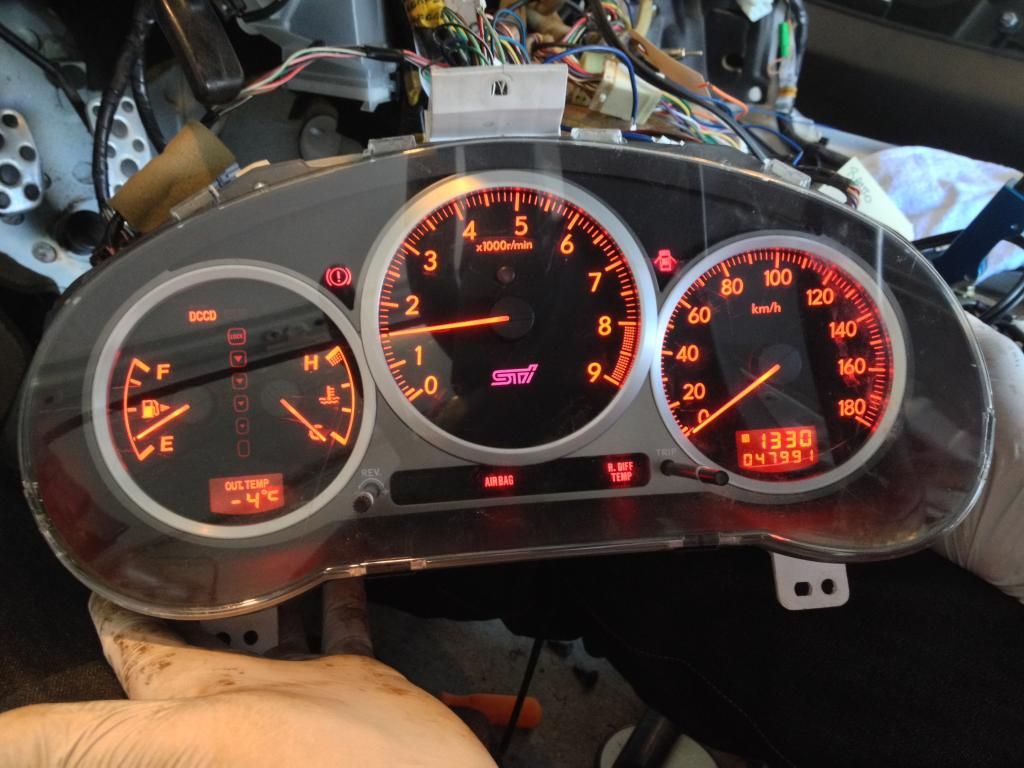
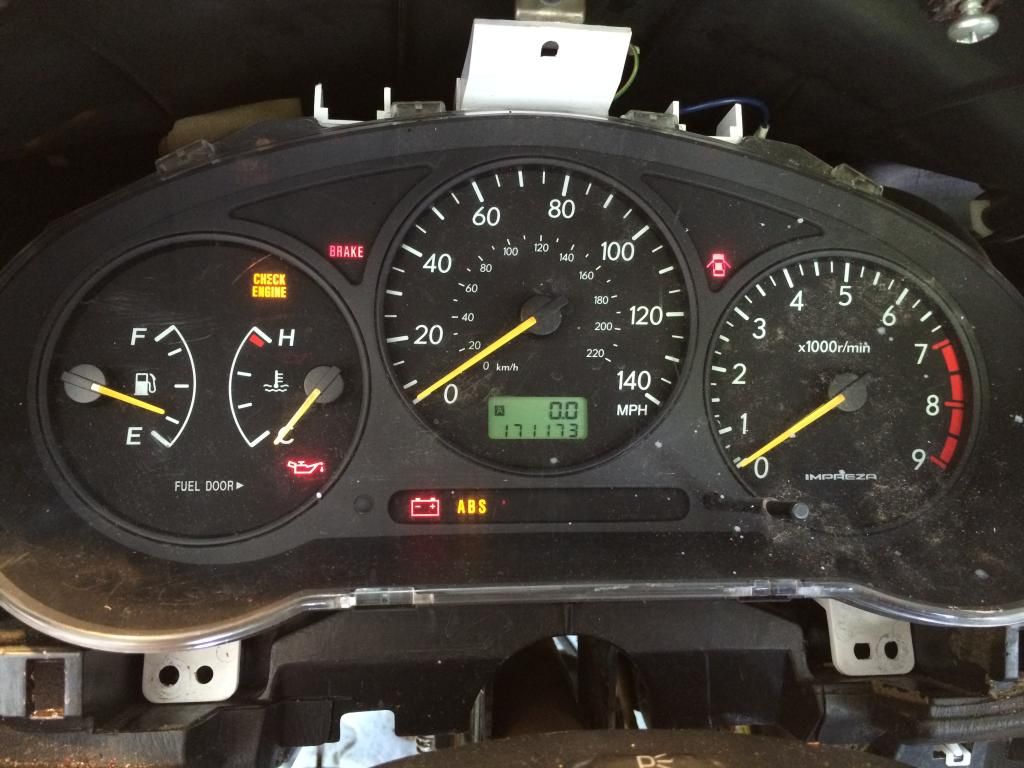
We got a JDM V8 STi dash with the car, which we verified works perfectly, so we may use it in our 818. It has some neat features, like a user-selectable shift light. We might need to do something about the speedo being in KPH, though!

JDM V8 STi cluster
OEM 02 cluster
We finished up for the day around 7:00, with a quick oil change on Tamra's car.

Tomorrow is autocross in the Miata! TONS of entries, around 130 pre-registered.

Saturday, May 24, 2014

Organizing.. or attempting to

We've definitely been beginning to recognize the challenges of working in a 200 sq ft garage. There's another similarly sized one adjacent, but the two areas are separated by a concrete wall with only a standard sized door opening. The tool chest had been in the other side, which has a workbench. That wasn't working.

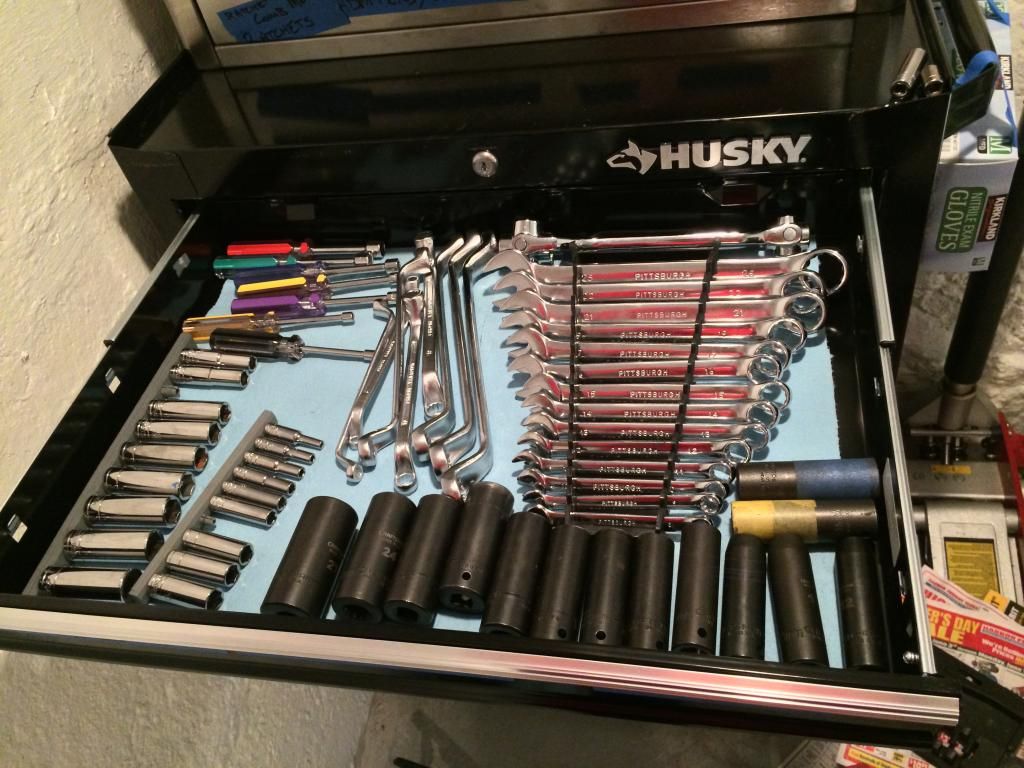
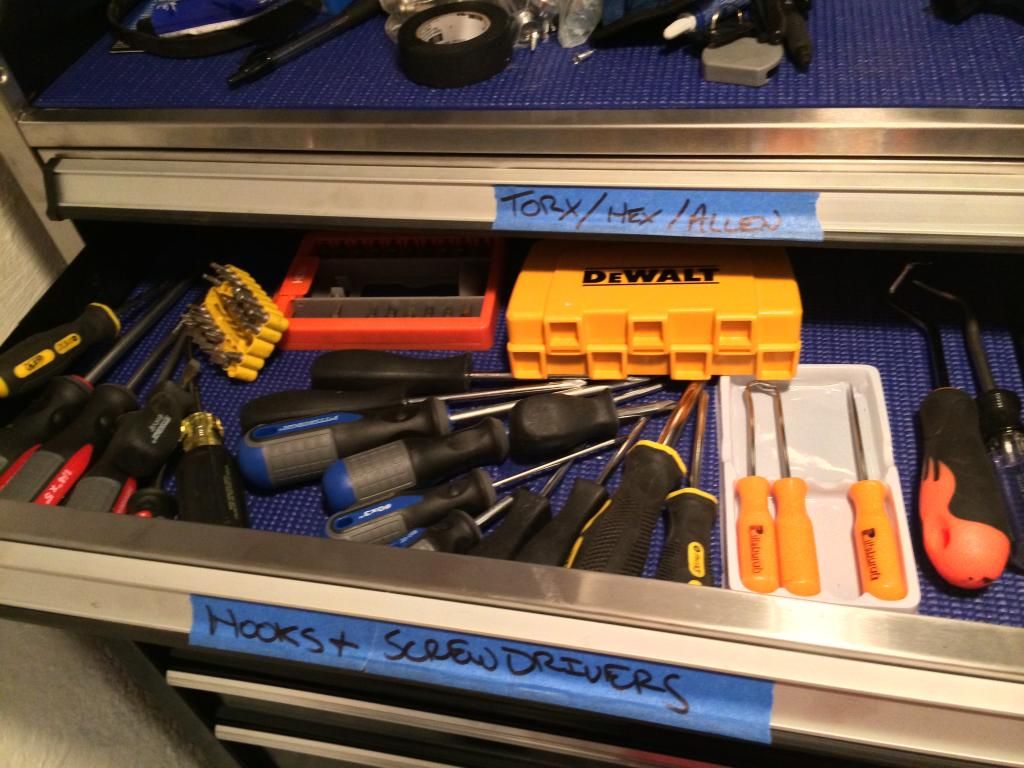
Today we went out and did some more shopping, some of the usual; Groceries, oil & filter for Tamra's car, but also a new lower tool cabinet for this project. We chased down one remaining home depot 5 drawer at a good price (cheaper than their new and improved (?!) 4 drawer! After a quick assembly, it was time to try and find homes for everything. It's still a bit of a mess, but a vast improvement to have everything in the same space as we're working.

This is what we're working with for space on either side, and the new tool cabinet


Some drawers are pretty tidy.

And others are a bit less so.

But, everything has a place. For now. It should help a lot with getting rid of all the wasted time running from area to area chasing after each tool.


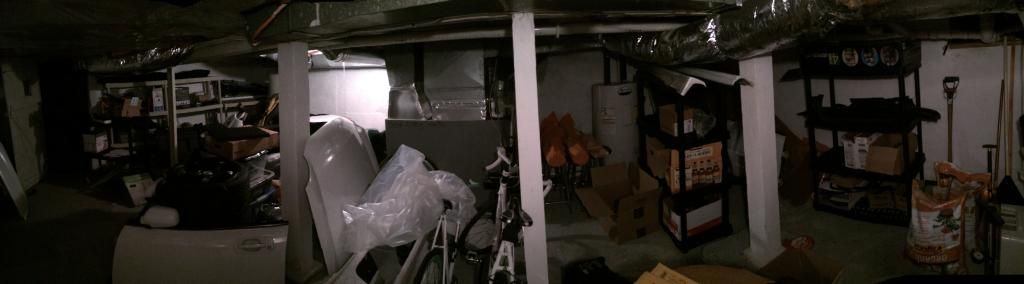
While I was shuffling tools, Tamra set in on the basement. Turns out, body panels take up a lot of space, when they're off of the car! She made some pretty significant improvements in how we were storing stuff, and got a handful of pictures for listing items for sale.


The panoramic makes it actually look like we're doing better than we are with storage space. We definitely need to get busy selling off the big pieces and a few spare sets of tires we have from the Mazda3 & Miata, so that we'll have room for all the remaining parts of the WRX.

Tomorrow should be a more productive day when it comes to actually removing parts from the car.